TO POST YOUR PICTURE (FREE)
Send
us your picture and short story via email to
pictures@braggingpost.com (See Tips
Below)or via U.S. Mail to:
The Bragging Post
1361 Union St. Ext. NE
Brookhaven, MS 39601
Pictures must contain an identified individual along with name, address,
phone #, and e-mail address of person submitting picture, date of harvest,
identity of harvest (type animal or fish) with usual info such as weight,
points, etc.
Send no copyright material and only material for which you have ownership.
Pictures must be non-offensive (YOU KNOW WHAT WE MEAN). Please honor your trophy
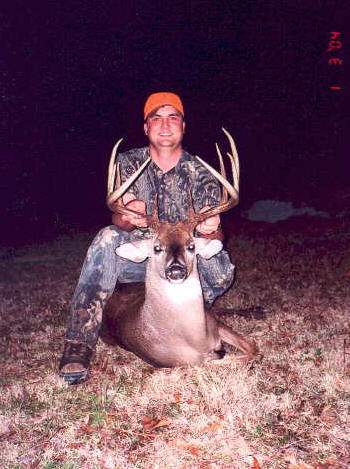
and present it to us at it's best. Do not sit on the animal or hang it by
the neck. Stick the animals tongue back in its mouth. Please help us to protect the hunter's image.
We reserve the right to
refuse posting or editing of any material submitted.
IF YOU DO NOT RECEIVE AN EMAIL REPLY OR
SEE YOUR PICTURE POSTED WITH 2 TO 3 DAYS, PLEASE
SEND A 2ND EMAIL ASKING ABOUT THE PICTURE AND BE SURE TO ENTER "PICTURE TO
POST" IN THE SUBJECT AREA. DUE TO SO MUCH SPAM EMAILS, WE MAY ACCIDENTALLY
DELETE YOUR EMAIL IF THE SUBJECT AREA IS NOT PROPERLY COMPLETED.
|
 |
Disclaimer
We claim no responsibility for authenticity of material submitted or any
responsibility to material posted or errors made in information provided. We
will not be responsible for return and/or damage to any photograph submitted to
us.
TIPS FOR SENDING PICTURES THRU EMAIL
Sizing Images For
Web Pages or For Sending Thru E-Mail
If you
want to put an image on your web page, or just send one to a friend or hopefully,
to the bragging post -- lets say you have it on disk
already, or you've figured out your scanner and are ready to roll. The problem,
frankly, is size. Whether you plan to display said image on-site or attach it
to an e-mail, it's considered good netiquette to make the process as quick and
as easy as possible for the viewer. It's YOUR responsibility to get that image
as small as possible without going too far and destroying the details; by
"small," we mean in terms of bytes, not necessarily height/width, although the
latter dimensions can often also use a bit of trimming, too. There are a number
of ways to accomplish this...
At The Scanner
Change the resolution to 72 dpi. 'Nuff said. Yes, this is
usually the lowest resolution, so you might think that it's the
worst...but in actuality, it's the lowest setting that looks the same
as the original, so it's perfectly safe to use. Scanning at a higher
setting is only recommended if you plan to trim the image to a
more reasonable size in a graphics program afterward.
Use the Prescan function. Every good scanning utility has it
-- click Prescan and then manipulate the selection "window"
(usually represented by a flickering outline hovering over the
prescanned image onscreen) to narrow the scanning selection
down to only the part you actually want. THEN click "Scan."
Got Photoshop?
Actually, almost any graphics program will do, as most of the
following tips are pretty universal. However, Photoshop is generally
your best bet for clean, accurate results.
Reduce the photo's size. First, make sure that the image is
in RGB color mode or Grayscale (depending in the type of image)
-- NOT Indexed Color. (More about that in a moment.) Then find
your program's sizing utility and bring it down, preferably to a size
which will fit easily and completely on even a small monitor.
(Remember: as with webpages, Scrolling Is Bad.) You may then
need to use a Sharpen tool to bring it back up to crispness.
Crop off the parts you don't really need. Is all that sky
above that big buck really essential to the photo? Do you really
need any white space around that button image? Unless you're a
compulsive completist or the background is really, really important,
figure out what's important about the image and crop the pic
down to focus on it.
Indexed Color is your friend. To be brief, this option figures
out which colors are actually IN the picture and eliminates all of the
other myriad unused shades which might be lurking on the pic's
palette. Nine times out of ten, saving in Indexed Mode will not
harm your image and will dramatically reduce its download size
without affecting its appearance in the least. However, remember
to always switch temporarily back to RGB mode if you wish to resize
the image. Trust us.
Before you save, check your file format! SAVING YOUR PIC AS A .BMP IS
LITERALLY A BIG “NO-NO” unless you intend to use the image
as a Windows background. Your best bet is either .gif or .jpg. .Gifs
are usually slightly larger but they preserve every single pixel
this is absolutely essential if you plan to work with a picture later) and,
combined with Indexed Color, are websafe. This means that the
colors won't go funky in most browsers. .Jpgs do have a tendency
to get loopy on some viewers because they lump similar colors
together to save space, but they're definitely small tidy files and
are easy to store, send, and view.
NOTE: If you are working with a scanner which does not give you
either .gif or .jpg as an option, save as a .BMP or a .tif and then
open the image in a graphic program to resave (Save As) in the
proper format. You might have to switch the image to Index Color
first to enable "gif" as a Save option.
Now, you're ready to send!
Home
